The direct answer
To learn how to prepare a class presentation, check the rubric, set a minute budget for your slot, build one claim with three points, make one idea per slide, write prompt cards, rehearse aloud four times, prepare three likely questions, and plan the day. Start with the rubric, not with slides.
Most talks go wrong before anyone stands up. Slides come first, the talk grows to fit them, and the speaker reads what the audience is already reading. Time runs out and the close gets rushed.
A class presentation is a prepared, rubric-graded talk to classmates, often in a group, in a fixed slot: one claim, supported clearly, finished on time. It sits inside how to build a study system that fits your life, so decide task, time, and check before you start.
The system in short
- Check the rubric and set a minute budget for your slot.
- Build one claim with three points, in order.
- Make one idea per slide and prompt cards, not a script.
- Rehearse aloud four times and prepare three likely questions.
- Plan the day, the tech check, and the group handoffs.
Use these class presentation tips in order.
Step 1: Check the rubric and budget your minutes
Read the brief and marking criteria before you open a slide deck. Note the time limit, whether questions sit inside the slot, and what the rubric rewards: often knowledge, evidence, structure, and delivery. Note file format, deadline, cue card rules, and group marks.
Next, set a minute budget: a short opening, most time on three points, a short close. This is a practical starting point, not a research rule. Subtract question time first if it sits inside your slot.
| Time slot | Opening | Three points | Close |
|---|---|---|---|
| 3 minutes | 30 seconds | 2 minutes | 30 seconds |
| 5 minutes | 45 seconds | 3 minutes 30 seconds | 45 seconds |
| 10 minutes | 1 minute | 7 minutes 30 seconds | 1 minute 30 seconds |
Finish about 30 seconds early in rehearsal. Mark one example optional. Drop the optional example, never the close.
Write your claim in one sentence: what classmates should remember the next day. For example: “Our town floods because the channel is narrow, drains fill fast, and new building covers ground that used to soak water up.” If you cannot write one claim, you have two talks. Choose one.
Step 2: Build the structure around three points
Start from the middle. Choose three points, order them for a listener, then write the opening and close. This class presentation structure keeps the talk short: every sentence must serve one point, or it leaves.
Test each point with the explain a point in simple words check: say it aloud, name the evidence, name one example. If you need jargon, you do not know it well enough to present it. For the flooding talk: narrow channel fills fast; drains and paving send water to the river at once; new building sits where water goes.
Write the opening last and learn its first sentence by heart. In under a minute, name the topic, say why it matters, and preview the three points. Open with a question, a short scene, or why it matters to the class.
Write the closing line in full: restate the claim, answer the opening question, give one takeaway, and add no new evidence. Add signposts such as “The first cause is”, written at the top of each cue card.
Step 3: Make slides and cue cards people can follow
Build slides after the structure. If you ask how many slides for a class presentation, start with one idea per slide, roughly one slide per minute at most: 5 to 7 for 5 minutes, 8 to 10 for 10 minutes, including title and closing slides, plus a sources slide for questions.
Write each heading as the point, in a short sentence. Add one chart, picture, or three short lines. If a slide holds a paragraph, the audience reads it and stops listening.
Make slides readable from the back: large text, short lines, strong contrast. Do not rely on colour alone. Label chart lines in words, say key numbers aloud, allow reading time, use plain language, caption video, and add alternative text where your tool offers it.
Make cue cards, not a script: one per point, plus opening and close. Each holds a heading, three prompts, and one reminder, such as “Check the time”. Write opening and closing lines in full, number cards, and add a time mark such as “2:30”.
A bad card holds a paragraph. A good card holds prompts: “Point 1. Narrow channel. Rain fills it fast. October storm, water at bridge.” The good card tells you what to say next.
Step 4: Rehearse in four runs and prepare for questions
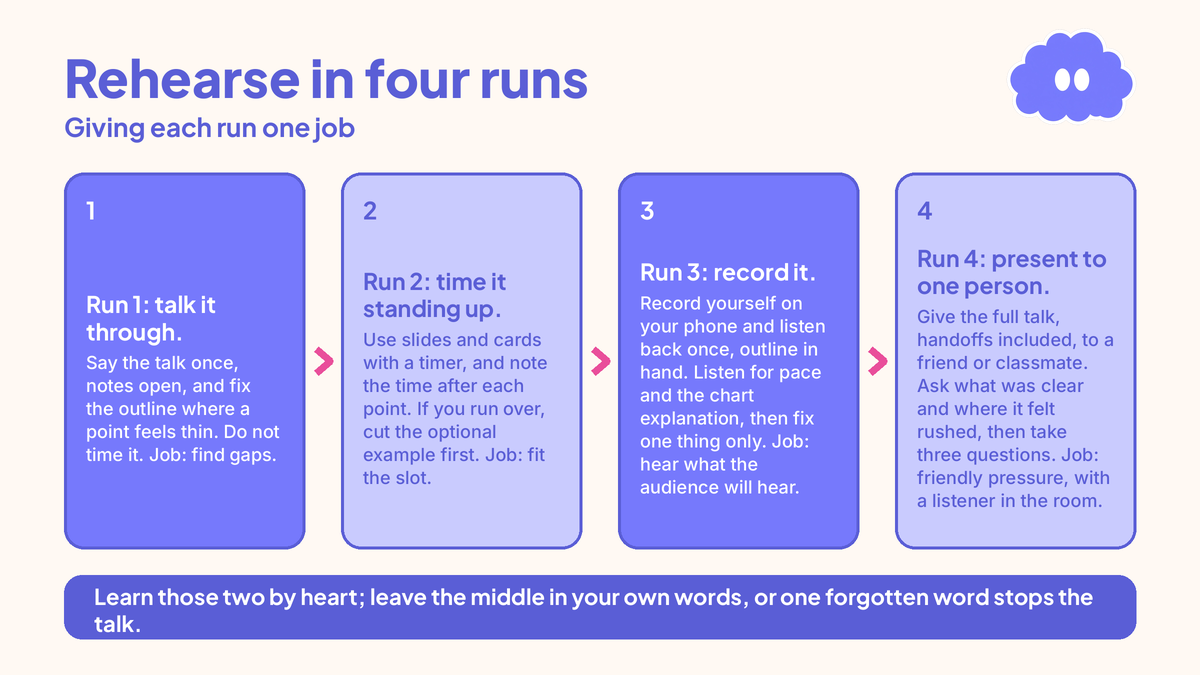
Knowing how to rehearse a presentation means giving each run one job, aloud, standing up, with slides and cards, from run two onward.
Run 1: talk it through. Say the talk once, notes open, and fix the outline where a point feels thin. Do not time it. Job: find gaps.
Run 2: time it standing up. Use slides and cards with a timer, and note the time after each point. If you run over, cut the optional example first. Job: fit the slot.
Run 3: record it. Record yourself on your phone and listen back once, outline in hand. Listen for pace and the chart explanation, then fix one thing only. Use record yourself explaining a topic to turn the recording into a fix list. Job: hear what the audience will hear.
Run 4: present to one person. Give the full talk, handoffs included, to a friend or classmate. Ask what was clear and where it felt rushed, then take three questions. Job: friendly pressure, with a listener in the room.
Speaking from memory is practice testing. Dunlosky and colleagues rated practice testing and distributed practice as the only two high-utility techniques out of ten in a 2013 review. Prompt cards show the gaps; rereading hides them.
Practise the opening five times alone, and the closing line five times too. Learn those two by heart; leave the middle in your own words, or one forgotten word stops the talk.
Prepare three questions. Prepare one “why”, one “how do you know”, and one “what if” question, with a two-sentence answer each, said aloud once. For follow-up technique, use the oral exam system for students.
Answer in one shape: pause, repeat, answer in two or three sentences, tie back to your claim. If you do not know, say: “I do not know, and I would check the rainfall records before I answered that.” Do not guess.
Step 5: Plan the day and the group handoffs
Pack the night before: cue cards, a printed slide copy if allowed, and two file copies, a USB stick and an emailed copy. Charge your laptop and write start time, room, and running order on one line.
Arrive 15 minutes early, test the screen, file, and sound, and check you can see a clock. Run the opening once, quietly, then stop. Do not run the whole talk in the corridor.
For how to present in class without being nervous, use preparation plus a routine: two friendly faces, a pause, a slow breath out, and the sentence you know by heart. If exam nerves affect you often, use the exam anxiety system for students for the week before and the morning.
A group presentation needs a written plan. Split minutes, not just topics, and write one handoff sentence per change, such as “That covers the river channel. Now Maya explains what the drains add.” Practise handoffs aloud in standing order.
Name who advances slides, who keeps time with a one-minute-left signal, and one backup per section. Rehearse together once, with slides, cards, and handoffs. For wider group habits, use how to revise with a study group.
Agree the absent-member plan in writing: the backup summarises a missing section from its card, order and close stay unchanged, and one person tells the teacher briefly, in private, after. Keep the written split, with dates.
If you present online, test camera, microphone, and sharing the night before, and say when you move slides, so listeners can follow without a clear screen.
A worked example: a group of three, one week, and a 10-minute talk
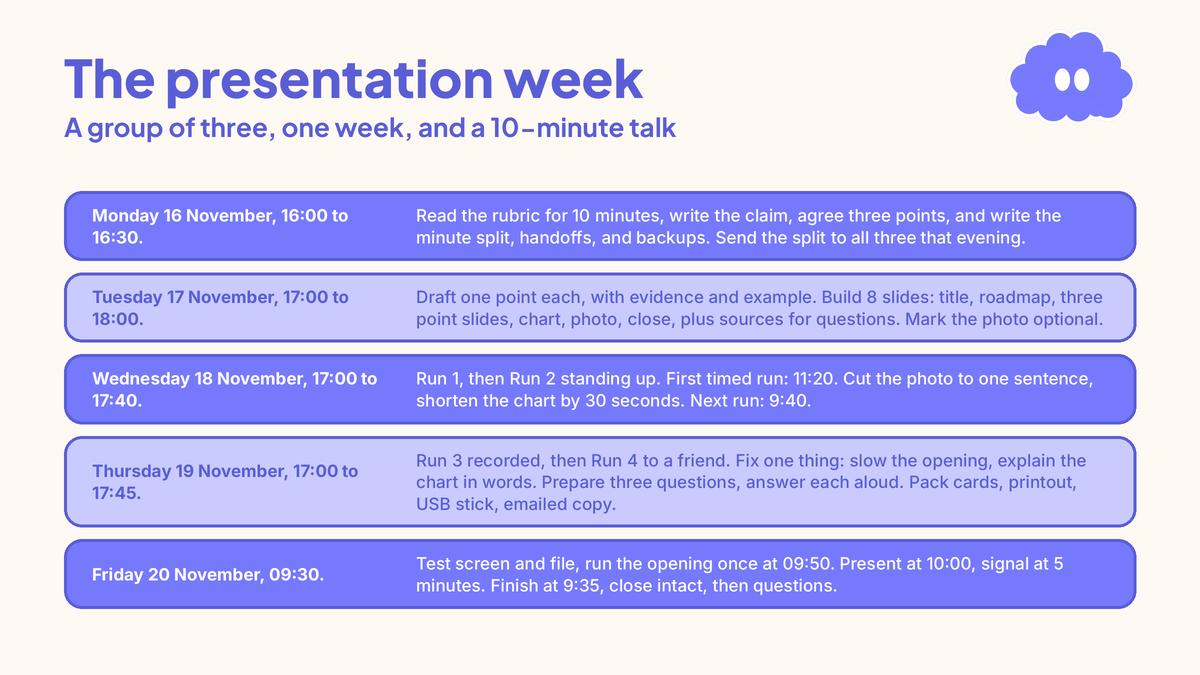
Your situation: a group of three, geography, 10 minutes at 10:00 on Friday 20 November 2026, questions after. Topic: why your town floods after heavy rain. Split: you, opening and point 1, 3:30; first partner, point 2, 2:30; second partner, point 3 and close, 4:00.
- Monday 16 November, 16:00 to 16:30. Read the rubric for 10 minutes, write the claim, agree three points, and write the minute split, handoffs, and backups. Send the split to all three that evening.
- Tuesday 17 November, 17:00 to 18:00. Draft one point each, with evidence and example. Build 8 slides: title, roadmap, three point slides, chart, photo, close, plus sources for questions. Mark the photo optional.
- Wednesday 18 November, 17:00 to 17:40. Run 1, then Run 2 standing up. First timed run: 11:20. Cut the photo to one sentence, shorten the chart by 30 seconds. Next run: 9:40.
- Thursday 19 November, 17:00 to 17:45. Run 3 recorded, then Run 4 to a friend. Fix one thing: slow the opening, explain the chart in words. Prepare three questions, answer each aloud. Pack cards, printout, USB stick, emailed copy.
- Friday 20 November, 09:30. Test screen and file, run the opening once at 09:50. Present at 10:00, signal at 5 minutes. Finish at 9:35, close intact, then questions.
If you have less than a day. One 90-minute evening, solo, 5-minute talk, 6 slides.
- 18:00 to 18:15. Read the rubric, write the claim, set the budget.
- 18:15 to 18:35. Choose three points, write opening and closing lines, note one piece of evidence per point.
- 18:35 to 18:55. Build 6 slides, one idea each, and 5 cue cards: opening, three points, close.
- 18:55 to 19:20. Two timed runs standing up. Cut the optional example if run one goes over 5 minutes.
- 19:20 to 19:30. Prepare three questions, answer each aloud, pack cards and two file copies. Then stop, and sleep.
When it goes wrong
You go blank mid-talk. Pause, check your card, and pick up from the last finished point: “Let me pick up from the last point, which was…” Do not apologise at length.
You run over time. At the halfway check, drop the optional example. Say: “I will move to the final point, which is…” Keep the close.
Your slides stop working. Talk from your cards: “I will carry on without the slides, and describe the chart aloud.” Give the key numbers and move on.
A group member does not show up. The backup covers the section in one summary from the missing card. Keep order and close unchanged. Tell your teacher briefly, in private, after.
A question stumps you. Pause, repeat the question, and answer only what you know: “I do not know, and I would check that before I answered.” Name the source you would check, then stop.
Your nerves spike at the start. Pause, breathe out slowly, and look at one friendly face. Say your learned first sentence, pause again, then give the roadmap sentence.
Weekly review checklist
Answer these in writing, on the same day if you can.
- Did you finish inside your time slot, with the close intact?
- Which point did listeners follow most easily, and what made it clear?
- Which slide or chart needed more explanation aloud?
- What did the questions show you did not yet know well enough?
- What one change will you make for the next talk?
File slides, cards, and split together, with date and topic on the file name. Change one thing only next time.
Downloadable infographic spec: one vertical image, title “How to prepare a class presentation”, with the five steps from “The system in short”, the rule “Drop the optional example, never the close.”, and the five review questions, in Thynq cream, Cloud Purple, Dark Purple and pink, with the Cloud mascot. Text taken word-for-word from this article.
What this system is not
It is not a promise of grades. Clear structure, readable slides, and timed rehearsal give the rubric something to reward. They cannot guarantee a mark.
It is not an oral exam system. An oral exam is reactive: an examiner asks, you answer, with no slides or prepared talk. Use oral exam technique only for questions after your talk.
It is not a thesis defence. A defence is a postgraduate talk to a panel, with questions on method and limits. If that is your next talk, use how to prepare for a thesis defence instead, as the later, harder version. It is not a script to memorise. Without rehearsal aloud, the rest cannot save the talk.
Sources
- Prospects (2026). 6 steps to a successful presentation. Supports the rubric check, one idea per slide, prompt cards, timed rehearsal, and accessibility.
- University of Sheffield, StudySkills@Sheffield. How to plan, create and deliver presentations. Supports starting from the middle with three points, and the group checklist: order, handoffs, slides, timekeeping.
- Dunlosky, J., Rawson, K. A., Marsh, E. J., Nathan, M. J., & Willingham, D. T. (2013). Improving students’ learning with effective learning techniques. Psychological Science in the Public Interest, 14(1), 4-58. The review that rated practice testing and distributed practice as the only two high-utility techniques out of ten.
Questions
How many slides should a class presentation have?
Use one idea per slide, and plan roughly one slide per minute at most. A 5-minute talk usually needs 5 to 7 slides, including title and closing slides. A 10-minute talk usually needs 8 to 10 slides. A slide with only a chart, picture, or one short line still counts as one idea, and you explain it aloud.
How do you present in class without being nervous?
You do not remove nerves completely, and you do not need to. Learn your first sentence and closing line by heart, rehearse standing up with a timer, and pick two friendly faces. On the day, pause, breathe out slowly, and start with the sentence you know.
What do you do if a group member does not show up for the presentation?
Use the backup plan you agreed before the day. The named backup covers the missing section in one short summary, from the missing speaker’s cue card, and the group keeps the order and close unchanged. Do not apologise at length. After the talk, tell your teacher briefly, in private, and keep the written record.
How do you prepare for a class presentation in less than a day?
Use one 90-minute evening plan, and stop on time. Spend 15 minutes on the rubric and claim, 20 minutes on three points, 20 minutes on slides and cards, 25 minutes on two timed runs, and 10 minutes on three questions and packing. Then sleep. One timed rehearsal beats a late night of rewriting slides.