
The direct answer
How to write a lab report is a timed system, not a race through the sections. Capture the lab in your notes while you work. Write the methods and results first, while the details are fresh. Then write the discussion, then the introduction, and the abstract and title last.
A lab report follows IMRaD: Introduction, Methods, Results and Discussion, plus a title, an abstract, a conclusion, and references. Most guides describe what each section contains and stop there. That leaves the real problems untouched: forgotten details, results mixed up with opinions, and a report written in one panicked night. This system fixes the order of writing, so the hard parts get done while the lab is still fresh.
The system in short
- Capture the lab as you go: aim, method, readings, and problems, in your lab notes, during the experiment.
- Write the methods and results on day one, while the lab is fresh, using only your lab notes.
- Present the results cleanly: one table, one figure, and the rule that results state what happened, with no interpretation.
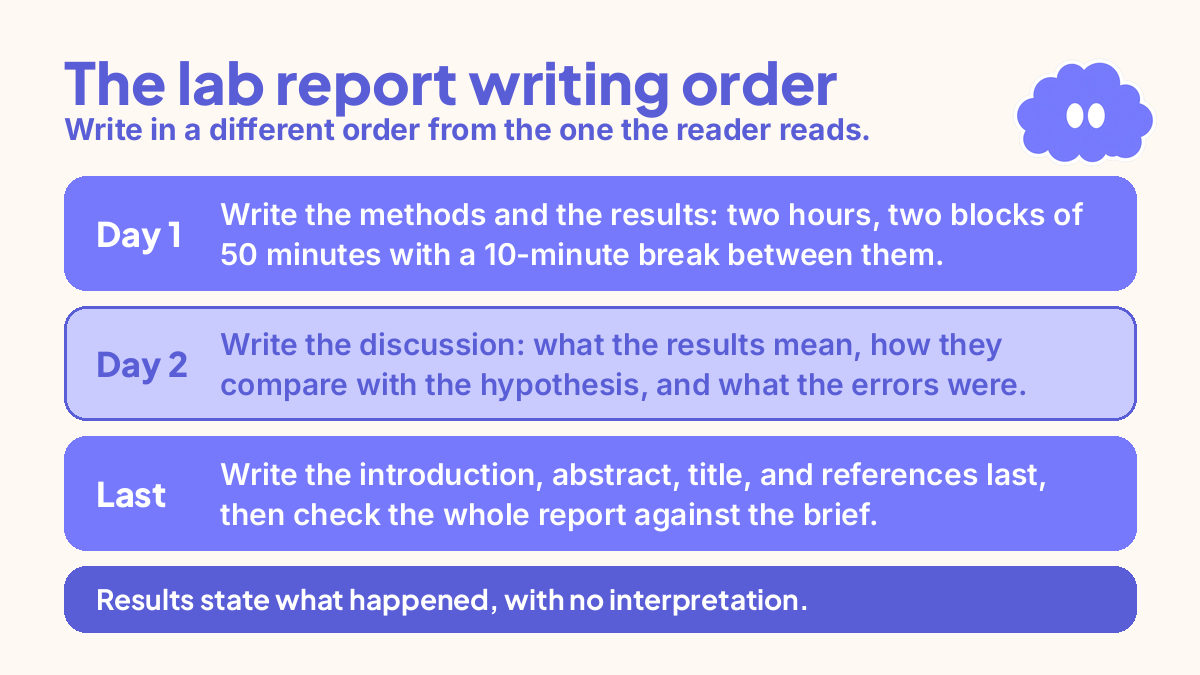
- Write the discussion on day two: what the results mean, how they compare with the hypothesis, and what the errors were.
- Write the introduction, abstract, title, and references last, then check the whole report against the brief before you submit.
Step 1: Capture the lab as you go
A lab report is written in the lab, not at your desk. The notes you take during the experiment are the report. If they are thin, the report will be thin, and no writing skill fixes that. The science study system covers how lab work fits into a weekly routine, and this capture habit makes the writing possible.
Keep one page per experiment in your lab notebook, or one dated file if your course uses digital notes. Write in ink or in a file you cannot silently edit later. The point is a record of what actually happened, not a tidy copy.
Record five things while you work.
- The aim, in one sentence. What are you trying to find out? Write it before you start.
- The method, as you do it. Amounts, settings, times, and the order of steps. Write the numbers you actually used, not the ones in the lab manual.
- The readings, as they come. Every measurement, with units, in a table. Note the time of each reading if the experiment runs over minutes.
- The observations. Colour changes, unexpected sounds, a reading that jumps. These are the details the discussion needs later.
- The problems. Anything that went wrong, in the moment: a spill, a misreading, a piece of equipment that behaved oddly. Write it down now. You will not remember it in three days.
Do not tidy the notes in the lab: speed and honesty matter more than neatness.
Step 2: Write the methods and results first, on day one
Write the report in a different order from the one the reader reads it in. Start with the sections that depend on memory, and leave the sections that depend on thinking until later.
On day one, within 24 hours of the lab, write the methods and the results: two hours, two blocks of 50 minutes with a 10-minute break between them.
Write the methods from your lab notes only. Describe what you did, in enough detail for a reader to repeat it, in the past tense. Name the equipment, the amounts, the settings, and the order of steps. If you changed the method during the lab, say what you changed and why. The thesis methodology guide explains the same repeatability rule at thesis scale: a reader should be able to repeat your work from your words alone.
Then write the results. Start with the table of readings, copied from your lab notes, with units on every column. A copied number that is wrong is worse than a missing number, because it looks right.
Write one short paragraph under the table, stating the pattern in plain words: what went up, what went down, what stayed the same. No interpretation yet.
Stop after day one. Do not start the discussion. The discussion needs a night of thinking, and the results need to sit untouched.
Step 3: Present the results cleanly and keep them separate from the discussion
Results and discussion are two different jobs, and the most common lab report mistake is mixing them.
The rule: results state what happened. Discussion explains what it means. If a sentence contains the word because, it probably belongs in the discussion. If a sentence gives a number or describes a pattern, it belongs in the results.
Build the results section from two pieces: one table and one figure.
- The table holds the readings: every measurement, with units, in rows and columns a reader can follow. Give it a number and a one-line title that says what it shows.
- The figure shows the pattern: a graph of the main relationship, with labelled axes, units, and a one-line caption. One figure that shows the pattern clearly beats three that repeat the table.
Refer to both in the text: “Table 1 shows the readings” and “Figure 1 shows the relationship”. A table or figure the text never mentions does not belong in the report.
Write the results paragraph in this shape: the pattern first, then the key numbers, then any unexpected readings. It says what happened and nothing else.
Check the numbers twice: read the table against your lab notes, then read the text against the table. Numbers that disagree are the first thing a marker notices.
Step 4: Write the discussion on day two
The discussion is where the marks are. It answers three questions: what do the results mean, how do they compare with what you expected, and what went wrong.
Start by comparing the results with the hypothesis. State the hypothesis in one sentence, then say whether the results support it, and give the numbers and the pattern that support your answer. If the results match the hypothesis, say so plainly and move on to the errors.
Check for a method error first. Did you use the wrong amount, misread an instrument, or start the timer late? If a specific error explains the disagreement, name it and say how it would have changed the result. If no error explains it, consider whether the hypothesis itself needs revising, and say what a revised one would predict.
Then deal with the errors honestly: every experiment has them. List the main sources of error in order of size, and say for each one whether it would push the result up or down. Random errors scatter the readings. Systematic errors shift them all one way. Name which kind each error is, and say what you would change next time to reduce it.
Do not hide an unexpected result, and never change a number to fit the hypothesis. It is falsifying data, and it is the one mistake that can end a science degree. If the results surprise you, say so, and explain what you think happened.
Step 5: Write the introduction, abstract, title, and references last
The introduction is easier to write once the results exist. Write it on day two, after the discussion, in 30 minutes.
The introduction has three jobs: the background, the aim, and the hypothesis. Give the background in a few sentences: what is already known, and what gap this experiment fills. State the aim in one sentence, the same sentence you wrote in your lab notes. State the hypothesis in one sentence, with the prediction it makes. If you need background reading, the guide to reading research papers for a thesis shows how to take notes from a paper without copying it.
On day three, write the abstract, the title, and the references, then check the whole report.
The abstract is 100 to 150 words: the aim, the method in one line, the main result with its key number, and the conclusion. Write it last. The guide to writing a research abstract covers the same structure at a longer scale.
The title names the experiment and the finding, not just the topic. “The effect of length on the period of a simple pendulum” tells the reader what you did. “Pendulum experiment” does not.
For references, use the style your course requires, and record each source as you use it, not at the end. The guide to managing references for a thesis covers reference managers.
Then run the final check, on paper if you can, in 30 minutes: numbers match between text, table, and notes; every table and figure has a number, a title, and a mention in the text; the results hold no interpretation; the abstract matches the report; and every reference is cited in the required style.
Fix what the check finds, then submit.
A worked example: a simple pendulum report written over three days
Your situation: first-year physics student. The experiment: measure how the period of a simple pendulum changes with its length. Lab on Tuesday morning, 10:00am to 12:00pm. Report due Friday, 5:00pm. All numbers below are example figures, not research findings.
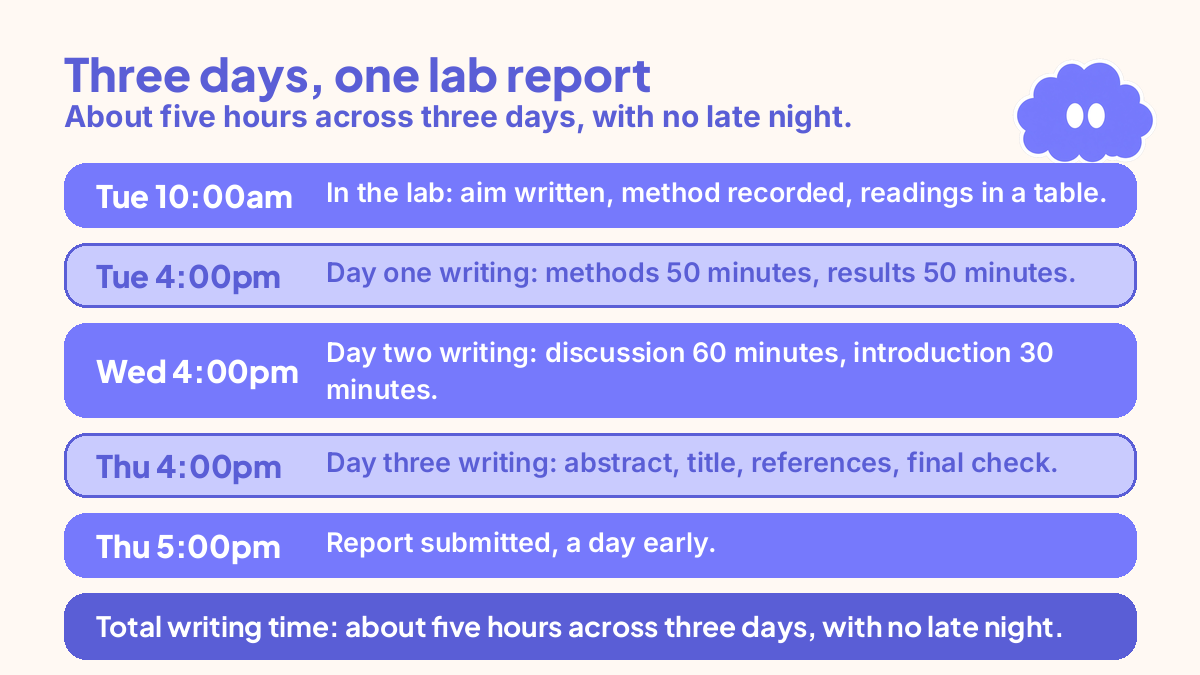
- Tuesday, 10:00am-12:00pm, in the lab: aim written before starting. Method recorded as you go: string lengths of 0.50 m, 0.75 m, and 1.00 m, timed over 20 swings each, three repeats per length. Readings in a table with units. One problem noted: the third repeat at 0.75 m ran long because the string caught on the clamp.
- Tuesday, 4:00-6:00pm, day one writing: methods written from the lab notes, 50 minutes, past tense, with the clamp problem included. Results written, 50 minutes: Table 1 with all nine readings, Figure 1 showing period against length, and one paragraph stating the pattern. Example figures: at 0.50 m the period was 1.42 s, at 1.00 m it was 2.01 s.
- Wednesday, 4:00-5:30pm, day two writing: discussion written in 60 minutes. The results support the hypothesis that a longer pendulum has a longer period. The 0.75 m repeat is explained by the clamp catching the string. Errors listed: timing variation and the clamp, timing named as the larger source.
- Wednesday, 5:30-6:00pm: introduction written, 30 minutes: background in four sentences, aim in one sentence, hypothesis in one sentence.
- Thursday, 4:00-5:00pm, day three writing: abstract written, 120 words, with the key result. Title written, references checked against the course style. Final check run on paper, 30 minutes: one number in the text disagreed with the table, and was fixed.
- Thursday, 5:00pm: report submitted, a day early. Total writing time: about five hours across three days, with no late night.
When it goes wrong
You took no notes in the lab. Write the methods from memory now, and mark every number you are unsure of. Ask a lab partner to check the readings against their notes.
Your results do not match the hypothesis. Check for a method error first, then consider revising the hypothesis. Never change the numbers. A strange result explained well earns more marks than a tidy result that cannot be true.
The results and discussion keep mixing together. Apply the because test to every sentence. If it explains why something happened, move it to the discussion. Rewrite the two sections separately, on different days, so the jobs stay apart.
You left the whole report to the night before. Write the methods and results first, tonight, from your lab notes, and submit those sections done well rather than the whole report done badly.
You cannot find the right references. Use the sources from the lab manual and the course reading list first. Two good references you have actually read beat six you have only listed.
The report is too long. Cut the introduction first, then the discussion. The methods and results stay. If a paragraph does not help the reader repeat the experiment or understand the result, it goes. The coursework essay system makes the same point for essays.
Weekly review checklist
Use this checklist at the end of each report, in writing, in 10 minutes, so the next report starts better.
- Did I capture the aim, method, readings, observations, and problems during the lab?
- Did I write the methods and results within 24 hours, while the lab was fresh?
- Does every sentence in the results state what happened, with no interpretation?
- Does the discussion name the errors, say which way each one pushes the result, and give one concrete improvement?
- Did the abstract, title, and references get written last, and do the numbers match between text, table, and notes?
- What one thing will I do differently in the next lab, and what stays the same?
Downloadable infographic spec: one vertical image, title “How to write a lab report”, with the five steps from “The system in short” and the six review questions above, in Thynq cream, Cloud Purple, Dark Purple and pink, with the Cloud mascot. Text taken word-for-word from this article.
What this system is not
This system is not a template you fill in without thinking. It does not promise grades. It is a writing order that protects fresh details, and a set of checks that keep results and discussion apart.
It is not a substitute for doing the lab properly. If the experiment was careless, the report will show it. It is also not a guide to referencing styles or to statistics. Your course sets the reference style, and your lab manual sets the analysis.
Sources
This system is built from the Thynq house method and the linked Thynq articles, not from a research study. No verified research source was used for the writing order or the lab-note routine.
For the full system behind this method, start with how to build a study system that fits your life.
Questions
What order should I write a lab report in?
Write methods and results first, while the lab is fresh, then the discussion, then the introduction, and the abstract and title last. The order you write in is not the order the reader reads in. Writing the results first stops you from forgetting the details that make the methods section accurate.
What is the difference between results and discussion in a lab report?
Results state what happened, with tables and figures and no interpretation. Discussion explains what the results mean, compares them with what you expected, and deals with errors. If a sentence contains the word because, it probably belongs in the discussion, not the results.
What do I do if my lab results do not match the hypothesis?
Report the results honestly and use the discussion to explain them. Check for a method error first, then consider whether the hypothesis itself needs revising. A result that disagrees with the hypothesis is not a failed experiment, and changing the numbers to fit is never acceptable.
How long should a lab report take to write?
Allow three days for a standard undergraduate report: day one for methods and results, day two for the discussion and introduction, day three for the abstract, references, and a full check. Short reports take less, but the order stays the same. Never write the whole report the night before it is due.