The direct answer
The Cornell notes system for students splits one page into three parts: a narrow cue column on the left, a wide notes column on the right, and a summary box at the bottom. You take notes in the right column during the lecture, write questions in the left column afterwards, and test yourself by covering the notes and answering the questions. That is the whole system.
Why the Cornell notes system for students works
You know the feeling. The lecture ends, you look down at three pages of notes, and they are a solid wall of text. Two weeks later, before the exam, you open them again and have to read the whole wall from the start.
The Cornell notes system for students fixes the second half of that problem. It does not ask you to take better notes in the lecture. It asks you to spend ten minutes after the lecture turning the page into something you can test yourself with.
The system comes from Cornell University, where it was developed in the 1950s. The research behind it: in a 2013 review, Dunlosky and colleagues rated ten common study techniques, and only two received a high utility rating — practice testing and distributed practice.
The system in short
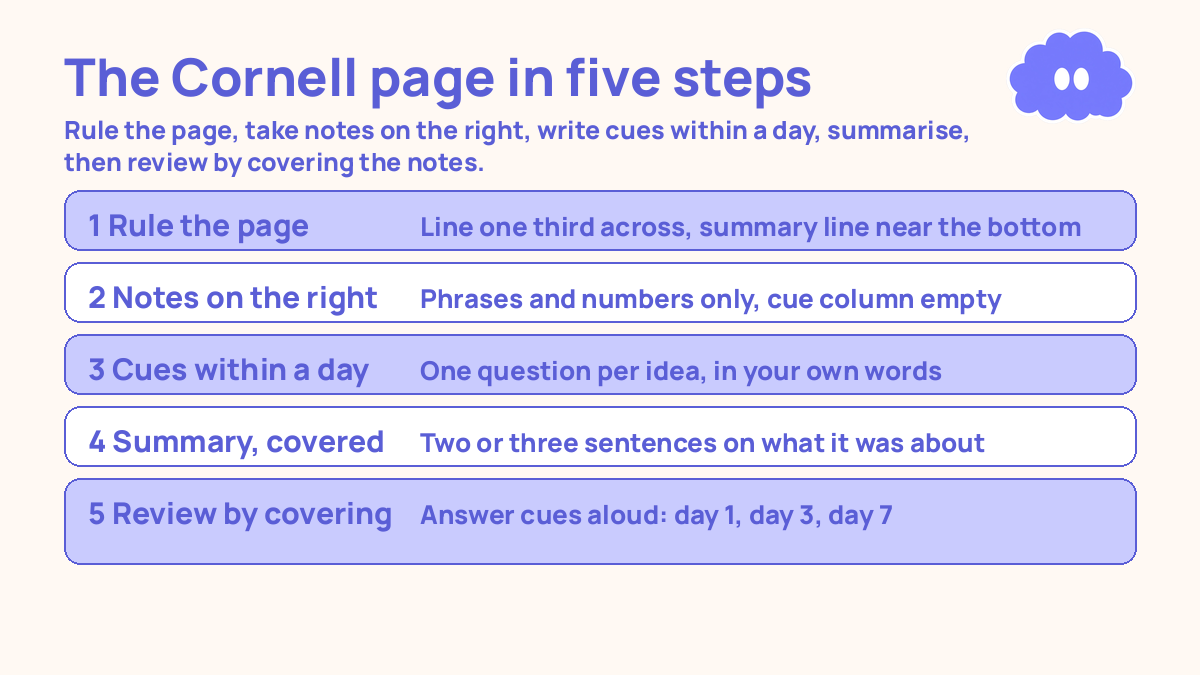
- Rule the page before the lecture: a vertical line about a third of the way across, and a horizontal line near the bottom for the summary.
- Take notes in the right-hand column only, in phrases and numbers, not full sentences. Leave the left column empty.
- Within a day, write a question or keyword in the left column for each chunk of notes. One cue per idea, in your own words.
- Write a two- or three-sentence summary at the bottom, in your own words, without looking at the notes column.
- Review by covering the notes column and answering the cues aloud. Check, mark the ones you missed, and come back after a gap.
Step 1: Rule the page before the lecture
Draw the lines before the lecture starts, not during it. On an A4 page, draw a vertical line about 6 centimetres from the left edge, running from the top down to about 5 centimetres from the bottom. Then draw a horizontal line across the page at that point. You now have three areas: the cue column on the left, the notes column on the right, and the summary box at the bottom.
Write the topic and the date at the top of the notes column. On a laptop, save the same layout as a template.
Step 2: Take notes in the right-hand column only
During the lecture, write in the notes column only. Leave the cue column empty. Do not fill it as you go. The cue column is for later, when you know what the lecture was actually about.
Write in phrases, not sentences. Capture the term, the number, the step, the name. “Photosynthesis: light reactions in thylakoid, produce ATP + NADPH” is a note. If the lecturer says something you do not understand, write it anyway and put a star next to it. A star means “I need to check this”, and you will deal with it in step 3.
Leave a blank line between ideas: one cue per chunk, one chunk per gap. If the lecture moves too fast, write less. Three honest phrases per idea beat a paragraph you stopped listening to write.
Step 3: Write the cues within a day
This is the step that makes the system work, and it is the step most students skip. Within a day of the lecture — that evening is ideal — go back to the page and write a question or keyword in the cue column for each chunk of notes. One cue per idea. The cue should be a question you could answer without looking at the notes: “Where do the light reactions happen?”, “What do they produce?”, “Why does the plant need ATP here?”
Write the cue in your own words. If you copy a phrase from the notes column into the cue column, you have made a label, not a question, and a label does not test anything. “Light reactions” is a label. “Where do the light reactions happen and what do they produce?” is a question that forces you to retrieve the answer.
Deal with the stars now: check the slides, the textbook, or a classmate, and fix the note while the lecture is still fresh. Ten minutes is enough for one lecture page — and it is also your first review.
Step 4: Write the summary at the bottom
After the cues are written, cover the notes column with your hand and write a two- or three-sentence summary in the bottom box, in your own words. A summary that says what the lecture was about and why it matters: “The light reactions use sunlight to make ATP and NADPH in the thylakoid membrane. The plant then uses those in the Calvin cycle to build sugars.”
If you cannot write the summary without looking, that tells you something useful: you do not understand the lecture yet. Go back, read the notes column once, and try again. Two or three sentences is the limit: more than that and you are writing notes again.
Dunlosky and colleagues rated summarisation as a low-utility technique on its own, and they were right: a summary you write once and never revisit does very little. The Cornell summary is different because it is not the end of the process. It is the thing you read first when you come back to the page, before you start testing yourself on the cues.
Step 5: Review by covering the notes column
Reviewing a Cornell page takes five minutes. Cover the notes column with your hand or a sheet of paper. Read the first cue. Answer it aloud, in full, from memory. Then uncover the notes and check. If you got it right, move on. If you got it wrong or half-right, put a small mark next to the cue and say the correct answer aloud once, from the notes.
Roediger and Karpicke showed in 2006 that students who restudied a passage remembered less a week later than students who recalled it, even though the restudiers felt more confident immediately. Feeling fluent right after re-reading is not the same as remembering a week later. The cover is what stops you lying to yourself.
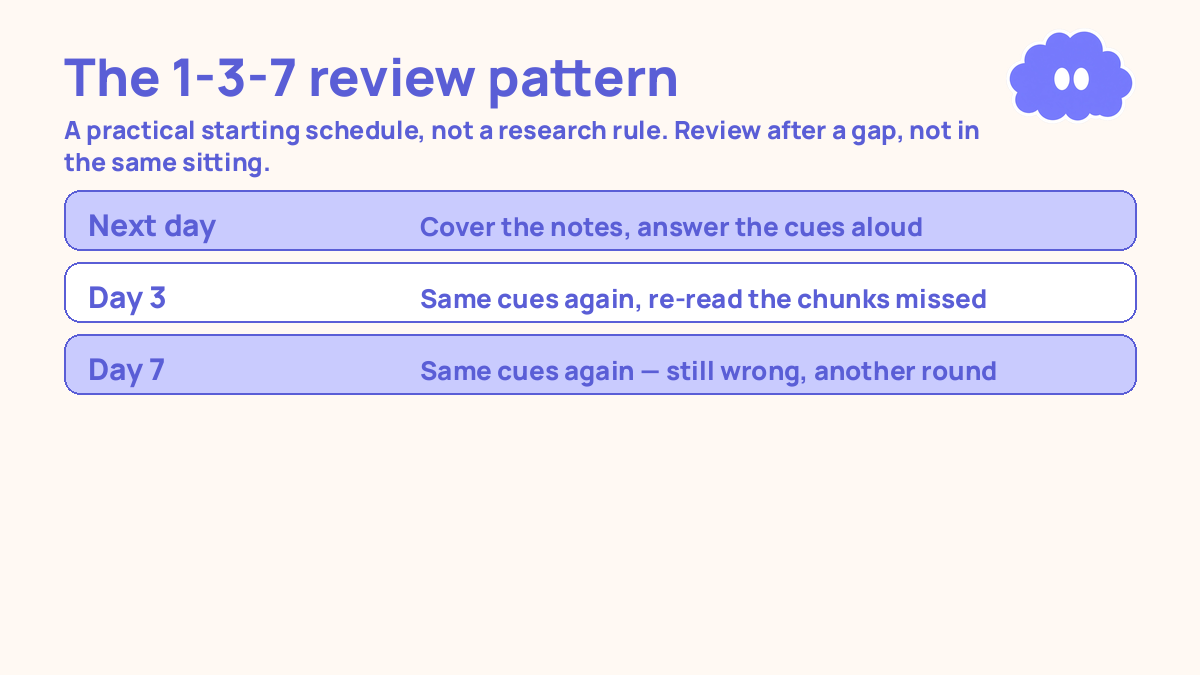
Come back to the page after a gap. A practical starting schedule is the next day, then after three days, then after seven days. That 1-3-7 pattern is a practical schedule to try for a week, not a rule from research. Cepeda and colleagues showed in 2006 that spacing beats massing, and the best gap grows with how long you need to remember the material. For a harsher version of the same test, the blurting method has you close the book and write down everything you remember before checking.
A worked example: a Tuesday with three lectures
You have three lectures on Tuesday: biology at 10am, history at 12pm, economics at 3pm. You rule three pages before you leave home, one per lecture.
10:00–11:00 — Biology. You write in the notes column only, in phrases. You star one point you did not follow: the difference between the light reactions and the Calvin cycle.
12:00–1:00 — History. Same layout. Dates and names as numbers and phrases, not sentences. 3:00–4:00 — Economics. Same again.
7:00–7:30pm — The evening session. Biology page first, ten minutes: cues for each chunk, the starred point checked against the slides, a three-sentence summary with the notes column covered. Then history, ten minutes. Then economics, ten minutes. Thirty minutes, three pages, and every page is now a test you can use.
Wednesday 7:00pm — First review. Cover the notes on the biology page and answer the cues aloud. Six of eight correct. Two marked. Five minutes.
Friday 7:00pm — Second review. Same page, same cues. Seven of eight correct. One still marked. Re-read that chunk and rewrite the cue so it asks the question more clearly. The following Tuesday — Third review. All eight correct. The page is done until exam revision.
| Page part | When you write it | What goes in it |
|---|---|---|
| Notes column (right, two thirds) | During the lecture | Phrases, numbers, steps, stars for gaps |
| Cue column (left, one third) | Within a day | One question per idea, in your own words |
| Summary box (bottom) | Within a day, notes covered | Two or three sentences on what the lecture was about |
| Review | Next day, day 3, day 7 | Cover the notes, answer cues aloud, mark misses |
When it goes wrong
You copy the slides word for word. The notes column fills up, the lecture passes, and you understood nothing. Fix it by writing in phrases and leaving gaps. Fill the detail in during the evening session, when you have the slides in front of you and time to think.
The cue column stays empty. This is the most common failure, and it kills the system. A Cornell page without cues is just notes with a line down the middle. Fix it by making the evening session non-negotiable: ten minutes per lecture, same time every day.
Your cues are labels, not questions. “Photosynthesis”, “Light reactions”, “Calvin cycle” — reading a label and then reading the answer feels like studying, but it tests nothing. Fix it by starting every cue with a question word: where, what, why, how.
You never cover the notes column. You read the cue, glance at the notes, and tell yourself you knew it. Fix it by making the cover physical: your hand, a sheet of paper, a folded page. Say the answer aloud before you look.
Weekly review checklist
Copy this list and use it each week:
- How many lecture pages got their cues and summary written within a day?
- Which pages still have an empty cue column, and what stopped me writing it?
- Which cues did I miss twice, and what will I change?
- Did I review each page after a gap, or did I review everything in one sitting?
Downloadable infographic spec: one vertical image, title “The Cornell page in five steps”, with the page layout and the five steps: rule the page, notes on the right only, cues within a day, summary with notes covered, review by covering the notes, plus the 1-3-7 review pattern, in Thynq cream, Cloud Purple, Dark Purple and pink, with the cloud mascot. Text taken word-for-word from this article.
What this system is not
It is not a promise of a grade, and it is not a claim that a ruled page makes you learn. The page is paper. What makes the system work is the testing — covering the notes and answering the cues — and the spacing — coming back after a gap. It is also not the only way to take notes. If you already have a notes system that you can actually review, Cornell is one layout inside that system, not a replacement for it.
Sources
- Dunlosky, J., et al. (2013). Improving students’ learning with effective learning techniques. Psychological Science in the Public Interest, 14(1), 4-58. Only practice testing and distributed practice received a high utility rating; summarisation was rated low.
- Roediger, H. L. & Karpicke, J. D. (2006). Test-enhanced learning. Psychological Science, 17(3), 249-255. Students who recalled a passage remembered more a week later than students who restudied it, even though restudiers felt more confident immediately.
- Cepeda, N. J., et al. (2006). Distributed practice in verbal recall tasks. Psychological Bulletin, 132(3), 354-380. Spaced practice beat massed practice; the best gap grows with how long the material must be remembered.
For the full system behind this method, start with how to build a study system that fits your life.
Questions
How wide should the cue column be?
About a third of the page, roughly 6 centimetres on A4. The notes column takes the other two thirds. The cue column only needs room for a short question or keyword, so keep it narrow.
What if the lecture moves too fast to take proper notes?
Write less, not faster. Capture phrases and numbers, not sentences, and leave gaps. If you missed something, mark the gap and fill it from the slides or a classmate the same day.
Does the Cornell system work for maths and problem subjects?
Yes, with one change. Use the notes column for the worked steps of a problem and the cue column for the problem type and the step where you usually get stuck. Then cover the steps and redo the problem from the cue alone.
How often should I review a Cornell page?
Cover the notes column and answer the cues the next day, then again after three days, then after seven. That 1-3-7 pattern is a practical starting schedule, not a research rule. If you still cannot answer a cue on day seven, that page needs another round.